To configure HTTP to host websites, whether personal or corporate, we must redirect all HTTP requests that reach the router, either internal or external. This procedure is part of the technique of ‘port forwarding’ and is done directly on the router, or through the command line. To redirect HTTP requests arriving at a router, we must follow the following steps:
Step 1. Access your router’s web management
For this, you have to write your routers IP address on the web browser, usually 192.168.1.1 or 192.168.0.1.
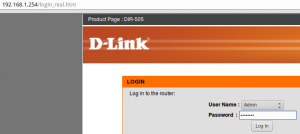
Step 2. Username and Password
If the security settings for your router is already configured, enter the username and password you used then.
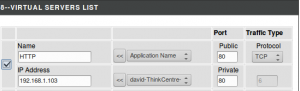
Step 3. Finding the ‘port forwarding’ section
It is likely that this section will be named in different ways according to the manufacturer, in the case of D-Link, it is called as “Virtual Server”, next the fields that must be completed.
- Application Name: ie HTTP, FTP, DNS, SMTP, POP3, Etc. In our case we will use HTTP or HTTPS. In D-Link you can choose from a drop-down list.
- Public Port Number: Each application has an assigned port, here we will use 80 or 8080.
- Traffic type: UDP or UDP. (Both of them)
- IP address: The IP address assigned to your server. (Other than the router or gateway). In D-Link you can choose from a drop-down list.
- Private Port Number: The port that will be used on your internal network.
Step 4. Creating a custom entry
Once all the required fields have filled , save the changes and restart the router.
Note: you must know configuring virtual servers on your private network represents a risk of attacks, so, you have to provide all security actions needed to protect the network.